
Are you preparing to host a Thanksgiving feast or planning a special family dinner? Cooking a turkey can be a daunting task, especially if you want to achieve that perfectly cooked, juicy, and flavorful bird. The key to success lies in knowing exactly how long to cook your turkey. In this comprehensive guide, we will take you through the step-by-step process, providing you with all the information you need to ensure a delicious outcome.
Before we dive into the cooking times, it's important to note that the cooking time of a turkey depends on various factors, such as the weight of the bird, whether it's stuffed or unstuffed, and the cooking method you choose. With that said, let's get started on our journey to turkey perfection!
Determining the Ideal Cooking Time
When it comes to cooking a turkey, determining the ideal cooking time is crucial. Several factors come into play, including the weight of the bird, whether it's stuffed or unstuffed, and the cooking method you're using. Let's break down each factor and how it affects the cooking time.
Turkey Weight
The weight of the turkey plays a significant role in determining the cooking time. As a general rule of thumb, you should allow around 13 minutes of cooking time per pound of turkey. For example, if you have a 12-pound turkey, you would need to cook it for approximately 2 hours and 36 minutes.
However, it's important to note that this is just a guideline. The best way to ensure the turkey is cooked to perfection is by using a meat thermometer. Insert the thermometer into the thickest part of the turkey's thigh, without touching the bone. The internal temperature should reach 165°F (74°C) for safe consumption.
Stuffed vs. Unstuffed
Whether you choose to stuff your turkey or not also affects the cooking time. If you decide to stuff your turkey, you need to account for the extra time it takes to cook the stuffing thoroughly. It's essential to ensure the stuffing reaches a safe internal temperature of 165°F (74°C).
As a general guideline, you should add an additional 30 minutes of cooking time per pound of turkey if you're stuffing it. For example, if you have a 12-pound turkey and you're stuffing it, you would need to cook it for approximately 3 hours and 36 minutes.
Cooking Method
The cooking method you choose also affects the cooking time of your turkey. The most common methods include oven roasting, deep frying, smoking, and grilling. Let's explore each method and its corresponding cooking time.
Preparing the Turkey for Cooking
Before the cooking process begins, there are essential steps you need to take to prepare your turkey. From thawing to seasoning, we will guide you through the necessary preparations for a perfectly cooked bird.
Thawing the Turkey
Thawing the turkey is a crucial step to ensure even cooking and prevent any food safety issues. The safest way to thaw a turkey is by placing it in the refrigerator. Allow approximately 24 hours of thawing time for every 4-5 pounds of turkey. For example, a 12-pound turkey would require about 2-3 days to thaw in the refrigerator.
If you're short on time, you can use the cold water thawing method. Submerge the turkey in its original packaging in a sink or large container filled with cold water. Change the water every 30 minutes to maintain a safe temperature. Allow 30 minutes of thawing time per pound of turkey using this method.
Seasoning the Turkey
Seasoning the turkey is key to enhancing its flavor. Begin by rinsing the turkey under cold water and patting it dry with paper towels. Generously season the turkey with salt, pepper, and any other desired herbs and spices. You can also add aromatics like onions, garlic, and herbs to the cavity of the turkey for additional flavor.
Trussing the Turkey
Trussing the turkey involves tying the legs and wings close to the body to ensure even cooking and a more aesthetically pleasing presentation. To truss the turkey, use kitchen twine to tie the legs together and tuck the wings under the body.
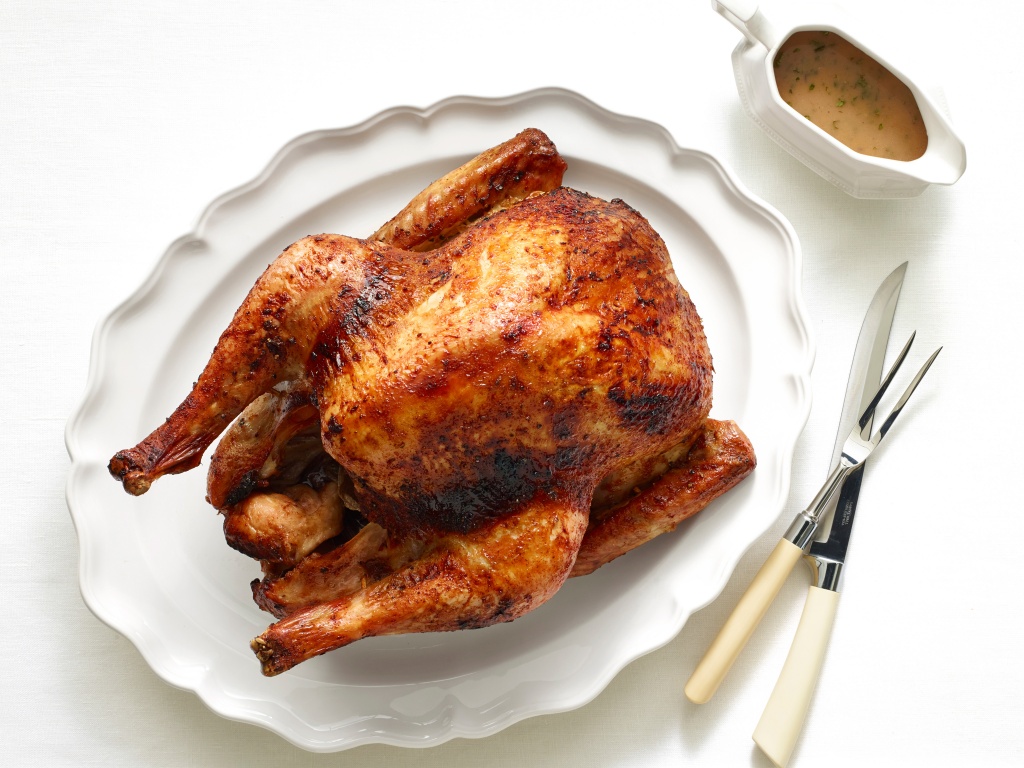
Oven Roasting: The Classic Method
Oven roasting is one of the most popular methods for cooking a turkey. In this section, we will outline the step-by-step process of oven roasting and provide you with tips and tricks to ensure a succulent and flavorful result.
Preparing the Oven
Preheat your oven to 325°F (163°C) and adjust the rack to the lowest position. This allows for optimal heat circulation around the turkey.
Roasting the Turkey
Place the turkey, breast-side up, on a rack in a roasting pan. Brush the turkey with melted butter or oil to promote browning and help keep the skin moist. Cover the turkey loosely with foil to prevent excessive browning, and place it in the preheated oven.
Roast the turkey according to the cooking time guidelines we discussed earlier, based on the weight of your turkey. Remember to baste the turkey with its juices every 30 minutes to keep it moist and flavorful.
Monitoring the Temperature
It's crucial to monitor the internal temperature of the turkey throughout the cooking process. Insert a meat thermometer into the thickest part of the thigh without touching the bone. The turkey is safe to consume when the internal temperature reaches 165°F (74°C). If the turkey starts to brown too much before reaching the desired temperature, tent it with foil.
Resting the Turkey
Once the turkey reaches the desired internal temperature, remove it from the oven and tent it loosely with foil. Allow the turkey to rest for at least 20-30 minutes before carving. This resting period allows the juices to redistribute, resulting in a moister and more flavorful turkey.
Deep Frying: A Crispy Alternative
If you're looking for a different cooking technique that yields a crispy, golden-brown skin, deep frying might be the way to go. Discover the ins and outs of deep frying a turkey, including safety precautions and the ideal cooking time.
Choosing the Right Equipment
Deep frying a turkey requires specialized equipment, including a turkey fryer, a propane tank, and a thermometer. It's essential to use a fryer specifically designed for poultry to ensure safety and optimal cooking results.
Preparing the Turkey and Fryer
Before deep frying, make sure the turkey is completely thawed and dry. Remove any excess moisture from the turkey's surface to prevent oil splatters. Fill the fryer with the appropriate amount of oil, following the manufacturer's instructions.
Heating and Frying the Turkey
Heat the oil to the recommended temperature, usually around 350°F (177°C). Carefully lower the turkey into the hot oil using a turkey lifter or hooks attached to the fryer. The turkey should be fully submerged in the oil.
Monitor the oil temperature throughout the frying process and adjust the heat as needed to maintain a consistent temperature. The turkey should cook for approximately 3-4 minutes per pound. Use a meat thermometer to ensure the internal temperature reaches 165°F (74°C).
Allowing the Turkey to Rest
Once the turkey is cooked, carefully remove it from the fryer and let it rest on a cutting board or a wire rack for at least 20-30 minutes. This resting period allows the juices to redistribute, resulting in a juicier and more flavorful turkey.
Smoking: Infusing Flavor with Wood Chips
Smoking a turkey imparts a unique and smoky flavor that many food enthusiasts adore. Learn about the different types of wood chips to use, along with step-by-step instructions for smoking your turkey to perfection.
Choosing the Right Wood Chips
The choice of wood chips is crucial when smoking a turkey. Different types of wood chips impart distinct flavors. Popular options include hickory, apple, mesquite, and cherry wood chips. Soak the wood chips in water for at least 30 minutes before using them in the smoker.
Preparing the Smoker
Preheat your smoker to a temperature of around 225°F (107°C). Add the soaked wood chips to the smoker box or directly onto the charcoal, depending on the type of smoker you're using. The smoke produced by the wood chips will infuse the turkey with its unique flavor.
Smoking the Turkey
Place the turkey on the smoker rack, breast-side up. Close the smoker and let the turkey smoke for approximately 30 minutes per pound. Maintain a consistent temperature throughout the smoking process, occasionally adding more wood chips to sustain the smoke.
It's essential to monitor the internal temperature of the turkey using a meat thermometer. The turkey is safe to consume when the internal temperature reaches 165°F (74°C). Once the turkey reaches the desired temperature, remove it from the smoker and let it rest for 20-30 minutes before carving.
Grilling: Adding a Charred Twist
Grilling a turkey is a fantastic way to infuse it with a delicious smoky flavor and achieve a beautifully charred exterior. We will show you how to set up your grill, maintain the perfect temperature, and ensure even cooking for a mouthwatering result.
Preparing the Grill
Set up your grill for indirect grilling by lighting the charcoal on one side of the grill or turning on only one burner if you have a gas grill. Preheat the grill to a temperature of around 325°F (163°C).
Grilling the Turkey
Place the turkey on the grill grate, breast-side up, away from the heat source. If using charcoal, add some soaked wood chips to create smoke. Cover the grill and cook the turkey for approximately 13-15 minutes per pound.
It's crucial to monitor the internal temperature of the turkey using a meat thermometer. The turkey is safe to consume when the internal temperature reaches 165°F (74°C). If the turkey starts to brown too quickly, you can tent it with foil to prevent excessive charring.
Resting the Turkey
Once the turkey reaches the desired internal temperature, carefully remove it from the grill and let it rest on a cutting board or a wire rack for 20-30 minutes. This resting period allows the juices to redistribute, resulting in a juicier and more flavorful turkey.
Stuffing: What You Need to Know
Stuffing is a traditional accompaniment to roast turkey, but it can affect the cooking time and overall outcome. Discover the do's and don'ts of stuffing, along with alternative methods to infuse flavors into your turkey.
The Pros and Cons of Stuffing
Stuffing a turkey can add flavor and moisture to the bird, but it also poses some challenges. The stuffing needs to reach a safe internal temperature of 165°F (74°C), which may require longer cooking time for the turkey. Additionally, stuffing can prevent even heat distribution and result in an undercooked turkey.
Alternative Flavors
If you prefer not to stuff your turkey, there are alternative methods to infuse flavors into the bird. You can create a flavorful herb butter and rub it under the turkey's skin or stuff the cavity with aromatics like onions, garlic, and herbs. These methods add delicious flavors without affecting the cooking time.
Basting: To Baste or Not to Baste?
Basting a turkey can help keep it moist and impart additional flavors, but is it really necessary? We will discuss the pros and cons of basting and provide you with alternative techniques to achieve a succulent turkey.
The Pros and Cons of Basting
Basting a turkey can help keep the meat moist and add layers of flavor. However, it also involves opening the oven door frequently, which can affect the cooking time and temperature consistency. Basting can also cause the skin to become less crispy.
Alternative Moisture Techniques
If you choose not to baste your turkey, there are alternative methods to ensure a moist and flavorful bird. One technique is to rub the turkey with butter or oil before cooking. Another option is to place a tray of water or broth in the oven to create steam, which helps keep the turkey moist.
Resting and Carving: The Final Touches
Resting the turkey after cooking and properly carving it are crucial steps to ensure the best possible dining experience. We will guide you through the resting and carving process, ensuring your turkey is served at its peak.
Resting the Turkey
After the turkey is cooked, it's important to let it rest for at least 20-30 minutes before carving. Resting allows the juices to redistribute, resulting in a moister and more flavorful turkey. Tent the turkey loosely with foil to keep it warm during the resting period.
Carving the Turkey
When it comes to carving the turkey, follow these steps for beautiful and evenly sliced meat:
- Start by removing the twine or any trussing from the turkey.
- Use a sharp carving knife to make a horizontal cut above the drumstick to separate the leg and thigh from the turkey's body.
- Locate the joint between the drumstick and thigh and cut through it to separate them.
- Remove the wings by cutting through the joint where they meet the breast.
- Make a vertical cut along the breastbone, starting at the top and working your way down to the bottom.
- Slice the breast meat by cutting thin, even slices parallel to the breastbone.
Troubleshooting: Overcoming Common Challenges
Encountering challenges while cooking a turkey is not uncommon, but fear not! In this section, we will address common issues and provide troubleshooting tips to help you overcome them, ensuring a successful turkey feast.
Uneven Cooking
If you notice that your turkey is cooking unevenly, it could be due to several factors. One possible solution is to rotate the turkey in the oven or on the grill periodically. Another option is to use a roasting rack or elevate the turkey on a bed of vegetables to promote more even heat distribution.
Dry Turkey
If your turkey turns out dry, it may have been overcooked. To prevent this, ensure you're cooking the turkey to the appropriate internal temperature using a meat thermometer. Basting the turkey or using alternative moisture techniques can also help prevent dryness.
Excessive Browning
If the turkey is browning too quickly, tent it loosely with foil to prevent further browning. You can also lower the oven temperature slightly or move the turkey to a lower rack in the oven. When grilling, adjust the heat or move the turkey to a cooler part of the grill.
In conclusion, cooking a turkey to perfection requires careful consideration of various factors, including weight, cooking method, and stuffing. By following this comprehensive guide, you'll have all the knowledge and tips you need to achieve a mouthwatering, perfectly cooked turkey that will impress your guests and leave them craving more. So, roll up your sleeves, gather your ingredients, and get ready to embark on a culinary adventure that will result in turkey nirvana!
Comments
Post a Comment