
Learning how to take screenshots on Windows is an essential skill that can come in handy in various situations. Whether you want to capture a funny meme, save important information, or troubleshoot technical issues, knowing the right methods can make your life much easier. In this comprehensive guide, we will walk you through various ways to take screenshots on Windows, from the basic built-in tools to third-party software options. By the end of this article, you will be equipped with all the knowledge you need to capture screenshots effortlessly on your Windows device.
Using the Print Screen Key
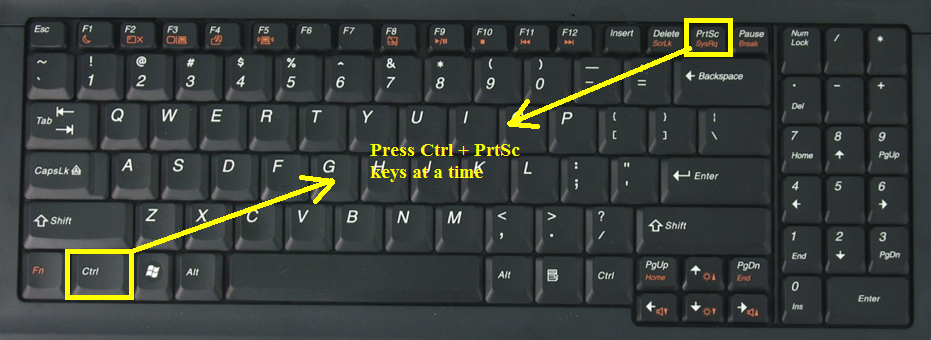
The Print Screen key, often labeled as "PrtScn" or "Print Scr" on your keyboard, is a fundamental method to capture screenshots on Windows. This method allows you to capture the entire screen or specific windows and save them as images. Here's how you can use the Print Screen key to take screenshots:
Capturing the Entire Screen
To capture the entire screen, press the Print Screen key. You won't receive any visual indication, but the screenshot is saved to your clipboard. To access the screenshot, open an image editing program or any application that allows image pasting, such as Microsoft Paint or Word. Once you have the program open, press "Ctrl + V" or right-click and select "Paste" to paste the screenshot. You can then save the screenshot as an image file.
Capturing an Active Window
If you want to capture only the active window instead of the entire screen, use the combination of the Alt key and the Print Screen key. First, make sure the window you want to capture is active, then press "Alt + Print Screen." Similar to capturing the entire screen, the screenshot is saved to your clipboard. Open an image editing program or any application that allows image pasting, and follow the same steps mentioned earlier to access and save the screenshot.
Taking a Screenshot of the Active Window
When you have multiple windows open and want to capture a specific window without including the others, the Alt + Print Screen method is useful. However, this method requires you to paste the image into another program to save it as a file. There is a more convenient built-in tool called the Snipping Tool that allows you to capture a specific window directly. Here's how to use it:
Launching the Snipping Tool
To launch the Snipping Tool, press the Windows key to open the Start menu, type "Snipping Tool," and click on the search result. Alternatively, you can use the search bar in the taskbar to search for and open the Snipping Tool.
Using the Snipping Tool to Capture a Window
Once the Snipping Tool is open, click on the "New" button. Your screen will appear faded, and your cursor will turn into a crosshair. Position the crosshair on the window you want to capture, click and drag to select the area, and release the mouse button. The captured screenshot will appear in the Snipping Tool window. To save the screenshot as an image file, click on the "File" menu, select "Save As," choose a location, and enter a filename for the screenshot.
Snipping Tool: A Built-in Screenshot Tool
The Snipping Tool is a versatile built-in screenshot tool that provides more capturing options than the Print Screen key alone. It allows you to capture various types of screenshots, including rectangular, free-form, window, and full-screen captures. Here's a detailed look at each capturing option:
Rectangular Snip
The rectangular snip is the default snipping mode in the Snipping Tool. To use this mode, open the Snipping Tool, click on the "New" button, and position the crosshair at the top-left corner of the area you want to capture. Click and drag to create a rectangular selection around the desired area, and release the mouse button. The captured screenshot will appear in the Snipping Tool window, allowing you to save it or make further edits before saving.
Free-Form Snip
With the free-form snip mode, you can capture screenshots in irregular shapes, perfect for capturing specific portions of the screen. To use this mode, open the Snipping Tool, click on the "New" button, position the crosshair at a starting point outside the desired area, click and drag to draw around the area you want to capture, and release the mouse button. The captured screenshot will appear in the Snipping Tool window for further editing and saving.
Window Snip
The window snip mode allows you to capture a specific window without including the rest of the screen. To use this mode, open the Snipping Tool, click on the "New" button, and select the window you want to capture by clicking on it. The captured screenshot of the window will appear in the Snipping Tool window for saving and editing.
Full-Screen Snip
If you want to capture the entire screen using the Snipping Tool, the full-screen snip mode is the most efficient option. To use this mode, open the Snipping Tool, click on the "New" button, and select "Full-screen Snip" from the drop-down menu. The entire screen will be captured, and the screenshot will appear in the Snipping Tool window for saving.
Using the Snip & Sketch Tool
The Snip & Sketch tool is an improved version of the Snipping Tool, introduced in Windows 10 with additional features and a more user-friendly interface. It offers more flexibility and options for capturing and annotating screenshots. Here's how to use the Snip & Sketch tool:
Opening the Snip & Sketch Tool
There are several ways to open the Snip & Sketch tool. One way is to press the Windows key to open the Start menu, type "Snip & Sketch," and click on the search result. Another way is to use the search bar in the taskbar to search for and open the Snip & Sketch tool.
Using the Snip & Sketch Tool to Capture Screenshots
Once the Snip & Sketch tool is open, you can choose from various capturing options available in the toolbar at the top of the window. These options include rectangular snip, free-form snip, window snip, and full-screen snip, similar to the Snipping Tool. Click on the desired option, and your screen will appear faded, allowing you to select the area you want to capture. After capturing the screenshot, it will open in the Snip & Sketch window for further editing and annotation.
Annotating and Saving Screenshots with Snip & Sketch
The Snip & Sketch tool provides a range of annotation tools to enhance your screenshots. You can use the pen tool to draw, the highlighter tool to emphasize specific areas, and the eraser tool to remove any annotations you no longer need. Additionally, you can add text boxes, arrows, and shapes to provide further context or instructions. Once you have finished annotating the screenshot, click on the floppy disk icon in the top-left corner of the window to save it as an image file. You can choose the location and enter a filename for the screenshot.
Utilizing the Windows Game Bar
If you enjoy gaming on your Windows device, the Windows Game Bar provides a convenient way to capture screenshots during gameplay or while using other applications. Here's how to use the Windows Game Bar to capture screenshots:
Enabling the Windows Game Bar
Before you can use the Windows Game Bar, you need to ensure it is enabled on your system. To do this, open the Windows Settings by pressing the Windows key and navigating to "Settings" (gear icon). In the Settings window, click on "Gaming," and then select "Game Bar" from the left sidebar. Toggle the switch to "On" under "Record game clips, screenshots, and broadcast using Game Bar." You can also customize the keyboard shortcuts for capturing screenshots in this settings page.
Capturing Screenshots with the Windows Game Bar
Once the Windows Game Bar is enabled, you can use it to capture screenshots. While in a game or application, press the Windows key + G to open the Game Bar overlay. Click on the camera icon in the toolbar or use the keyboard shortcut you have set to capture a screenshot. The screenshot will be saved to your designated screenshots folder, typically located in the "Videos" folder under your user directory.
Using the Print Screen Key with Snipping Tool
Combining the Print Screen key and the Snipping Tool provides you with an alternative method to capture screenshots with enhanced control. Here's how to use this method:
Capturing the Entire Screen with the Print Screen Key
Press the Print Screen key on your keyboard to capture the entire screen. The screenshot will be saved to your clipboard.
Opening the Snipping Tool
Launch the Snipping Tool by pressing the Windows key to open the Start menu, typing "Snipping Tool," and clicking on the search result.
Pasting and Editing the Screenshot in the Snipping Tool
With the Snipping Tool open, press "Ctrl + V" or right-click and select "Paste" to paste the screenshot from the clipboard into the Snipping Tool. You can now use the various snipping modes available in the Snipping Tool to select and capture the desired portion of the screenshot. Once captured, the edited screenshot can be saved as an image file.
Third-Party Screenshot Tools
While Windows provides built-in tools for capturing screenshots, there are also third-party software options available that offer additional features and customization. Here are some popular third-party screenshot tools you can consider:
Greenshot
Greenshot is a free and open-source screenshot tool that provides a range of capturing options and editing features. It allows you to capture full-screen, selected regions, or individual windows. Greenshot also offers annotation tools, such as text, shapes, and highlighting. Additionally, you can save screenshots directly to various file formats, upload them to cloud services, or send them via email.
Snagit
Snagit is a premium screenshot and screen recording tool that offers advanced features for capturing and editing screenshots. It provides a wide range of capturing options, including full-screen, region, scrolling windows, and even timed captures. Snagit includes a powerful editor with various annotation tools, effects, and the ability to create GIFs and videos. It also integrates with cloud services and offers easy sharing options.
Lightshot
Lightshot is a lightweight and user-friendly screenshot tool that allows you to capture selected areas, windows, or the entire screen. It provides a simple editing interface with basic annotation tools, such as arrows, text, and highlighting. Lightshot also offers the ability to search for similar images on the web and share screenshots directly via links.
ShareX
ShareX is an open-source screenshot and screen recording tool that offers a multitude of capturing options and customization settings. It supports capturing full-screen, windows, regions, and even scrolling pages. ShareX provides extensive annotation capabilities, including text, shapes, arrows, and watermarks. It also supports various file formats, integrates with cloud services, and offers advanced automation features.
Capturing Screenshots with OneNote
Microsoft OneNote, a powerful note-taking application, can also be used to capture and annotate screenshots. Here's how to use OneNote for capturing screenshots:
Opening OneNote and Creating a New Note
Open OneNote by searching for it in the Start menu or using the search bar in the taskbar. Once OneNote is open, create a new note by clicking on the "New Page" button or pressing "Ctrl + N."
Taking a Screenshot with OneNote
In the new note, click on the "Insert" tab in the ribbon at the top of the window. In the "Images" group, click on the "Screen Clipping" option. Your screen will appear faded, and your cursor will turn into a crosshair. Position the crosshair on the area you want to capture, click and drag to select the desired portion, and release the mouse button. The captured screenshot will be inserted into the note.
Annotating and Saving Screenshots in OneNote
OneNote provides a variety of annotation tools to enhance your screenshots. You can use the pen tool to draw, the highlighter tool to emphasize specific areas, and the text tool to add text boxes. Additionally, you can resize, crop, or rotate the screenshot as needed. OneNote automatically saves your notes, including screenshots, in the cloud, making them accessible across devices.
Using the Windows Snipping Keyboard Shortcut
If you frequently use the Snipping Tool or the Snip & Sketch tool, you can create a keyboard shortcut for quick access. Here's how to set up the Windows snipping keyboard shortcut:
Creating the Snipping Keyboard Shortcut
Press the Windows key to open the Start menu, type "Snipping Tool," and right-click on the search result. Select "Open file location" to open the location of the Snipping Tool shortcut. Right-click on the Snipping Tool shortcut, select "Properties," and navigate to the "Shortcut" tab. In the "Shortcut key" field, press the desired keyboard shortcut you want to assign. For example, you can press "Ctrl + Alt + S" or any combination that is not already in use. Click "Apply" and then "OK" to save the changes.
Using the Snipping Keyboard Shortcut
With the keyboard shortcut set up, you can now use it to quickly launch the Snipping Tool or the Snip & Sketch tool. Press the assigned keyboard shortcut, and the respective tool will open, ready for you to capture screenshots.
Exploring Additional Screenshot Tips and Tricks
Now that you are familiar with the various methods and tools for capturing screenshots on Windows, here are some additional tips and tricks to enhance your screenshot capturing experience:
Using the Clipboard History
Windows 10 introduced the Clipboard History feature, which allows you to access previously copied items, including screenshots. Press "Windows key + V" to open the Clipboard History panel. From there, you can select and paste any previously captured screenshots, eliminating the need to open an image editing program or application.
Customizing Screenshot File Names
When saving screenshots, consider customizing the file names to make them more descriptive and organized. Instead of relying on generic names like "Screenshot1," use specific names that reflect the content or purpose of the screenshot. This will make it easier to locate and identify screenshots in the future.
Using Snipping Tool Delay Feature
The Snipping Tool offers a delay feature that allows you to capture screenshots with a delay of a few seconds. This can be useful when you need to capture menus, tooltips, or other elements that disappear quickly. After launching the Snipping Tool, click on the "Delay" button and select the desired delay time. Then, proceed with capturing the screenshot as usual.
Using External Devices for Screenshots
If you have external devices connected to your Windows device, such as a graphics tablet or a smartphone, you may be able to use them for capturing screenshots. Many graphics tablets come with built-in screenshot buttons or customizable hotkeys that can simplify the screenshot capturing process. Some smartphone apps also allow you to capture screenshots directly from your device and transfer them to your Windows computer for further editing or saving.
Exploring Screenshot Shortcut Apps
If you prefer a more streamlined and customizable screenshot capturing experience, consider exploring specialized screenshot shortcut apps. These apps allow you to set up keyboard shortcuts or mouse gestures to capture screenshots instantly. By eliminating the need to launch a specific tool or press multiple keys, these apps can save you time and effort in capturing screenshots.
In conclusion, being able to take screenshots on Windows is a valuable skill that can greatly increase your productivity and efficiency. Whether you prefer using the built-in tools like the Snipping Tool or exploring third-party software options, there are various methods to suit your needs. By following the steps outlined in this comprehensive guide, you can become a screenshot pro in no time. Remember to practice and experiment with different tools to find the method that works best for you. Happy screenshotting!
Comments
Post a Comment