
Are you captivated by the enchanting beauty of roses and yearn to capture their delicate allure on paper? Look no further! In this comprehensive guide, we will take you on an artistic journey, guiding you through the step-by-step process of drawing a rose. Even if you have no prior artistic experience, this article will equip you with the necessary skills to create a stunning rose drawing that showcases your creativity and passion. So, grab your pencils, unleash your imagination, and let's embark on this artistic endeavor together!
Gathering the Right Tools
Before you begin your artistic journey, it's important to gather the right tools. Having the appropriate materials will ensure that your drawing experience is smooth and enjoyable. Here are a few essential items you'll need:
Pencils:
Invest in a set of high-quality pencils with varying degrees of hardness. The softer the pencil, the darker and smoother the lines it produces. Use softer pencils, such as 2B or 4B, for shading and creating gradients. Harder pencils, like HB or 2H, are ideal for sketching initial outlines and details.
Erasers:
Have both a kneaded eraser and a vinyl eraser on hand. A kneaded eraser is versatile and allows for precise erasing and shading effects, while a vinyl eraser is more suitable for erasing larger areas or removing stubborn marks.
Paper:
Choose a high-quality drawing paper that is sturdy and has a smooth surface. A heavier weight paper, such as 140lb or higher, prevents the pencil from smudging and allows for better shading and blending.
Other Optional Supplies:
Consider having a blending stump or tortillon for creating smooth gradients, a ruler for precise measurements, and a sharpener to keep your pencils in optimal condition.
Now that you have gathered the necessary tools, you're ready to embark on your artistic journey of drawing a beautiful rose!
Understanding Basic Shapes
Every drawing begins with basic shapes as a foundation. By breaking down the complex form of a rose into simple geometric shapes, you'll find it easier to capture its essence and proportions accurately. Let's explore the fundamental shapes that form the structure of a rose:
The Oval Shape:
Start by drawing a slightly elongated oval shape, which will serve as the central shape of the rose. This oval represents the bud or the center of the rose.
Petal Guidelines:
Inside the oval shape, lightly sketch guidelines to indicate the placement and direction of the petals. These guidelines will help you maintain proportion and symmetry as you add the petals later on.
Petal Shapes:
Now, it's time to add the individual petals. Roses typically have five or more petals that radiate from the center. Pay attention to the shape and arrangement of the petals, as they vary depending on the rose variety. Some petals may be curved, while others may be more pointed or rounded.
Bulb Shape:
At the base of the rose, draw a small, rounded bulb shape. This represents the receptacle, which holds the petals together.
Understanding these basic shapes will provide a solid foundation for your rose drawing. As you progress, you'll refine these shapes and add intricate details that bring your rose to life.
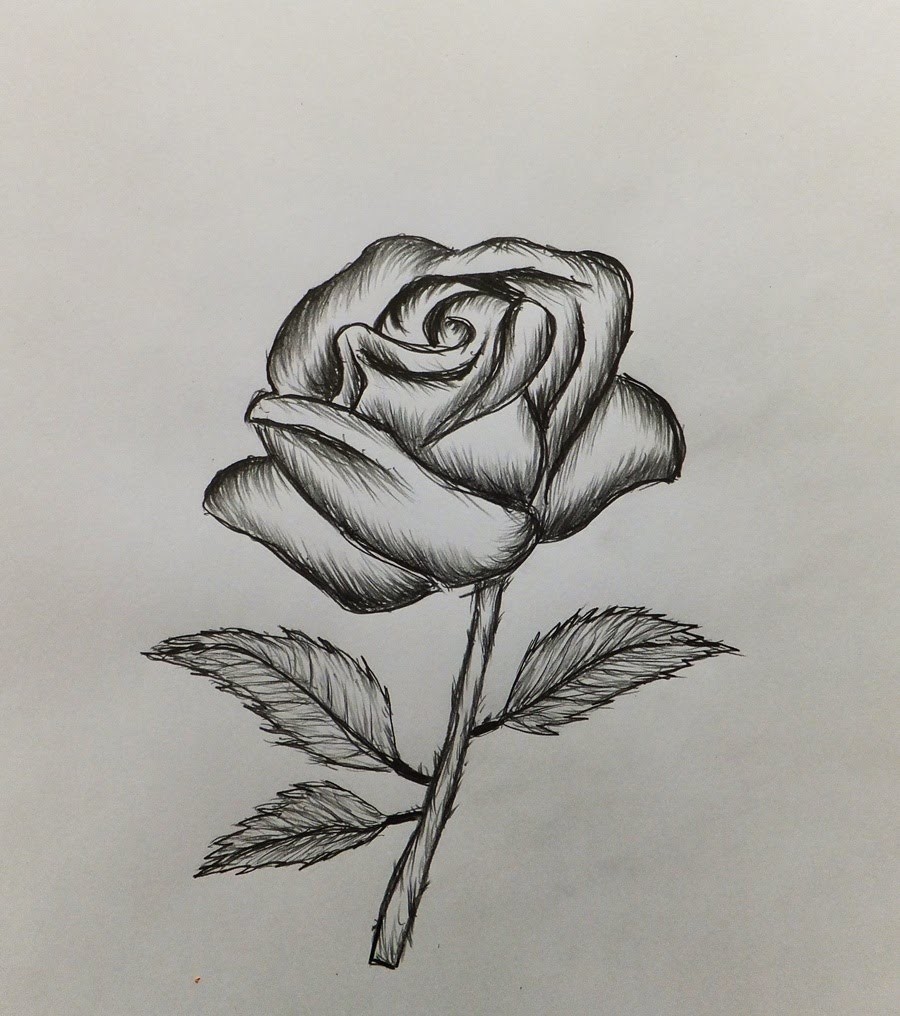
Drawing the Rose's Outer Petals
The outer petals of a rose add depth and volume to its overall appearance. To create a realistic depiction of a rose, you need to pay attention to the various shapes, sizes, and textures of the outer petals. Let's dive into the process of drawing these petals:
Contour Lines:
Start by lightly sketching the outer contour lines of the petals, following the guidelines you drew earlier. Observe the curves and folds of the petals as they radiate outward from the center. Remember that roses have different petal arrangements, so adjust your lines accordingly based on the rose variety you're drawing.
Petal Overlaps:
As you add more petals, pay attention to the areas where they overlap. Overlapping petals create depth and give your rose a three-dimensional appearance. Use gentle curves and subtle shading to indicate these overlaps, making sure not to overdo it and keep the drawing balanced.
Texture and Shading:
To add realism to your rose drawing, observe the texture and shading of the outer petals. Roses often have velvety and slightly wrinkled petals. Use hatching and cross-hatching techniques to create texture and shadows, varying the pressure and direction of your pencil strokes to achieve the desired effect.
Highlighting:
Don't forget to leave areas of light or highlights on the petals to create contrast and make them appear more three-dimensional. Use an eraser or a kneaded eraser to carefully lift off some of the graphite in areas where the light hits the petals.
By paying attention to the shapes, overlaps, textures, and shading of the outer petals, you'll create a beautifully detailed rose drawing that captures the essence of this enchanting flower.
Adding Detail to Inner Petals
The inner petals of a rose contribute to its intricate beauty, and drawing them requires careful observation and attention to detail. Let's delve into the process of adding detail to the inner petals:
Curved Petal Lines:
Start by sketching the curved lines that represent the inner petals. These lines should curve inwards, creating a sense of depth and dimension. Observe the unique shapes and contours of the inner petals, ensuring that they are proportionate to the outer petals.
Petal Textures:
Inner petals often have different textures compared to the outer ones. They may have more folds, creases, or ruffled edges. Pay close attention to these details as you add texture to the inner petals. Use hatching, cross-hatching, or stippling techniques to create the desired texture, adjusting your pencil pressure and stroke direction accordingly.
Veins and Ridges:
To enhance the realism of your rose drawing, incorporate veins and ridges on the inner petals. Observe the natural patterns and lines that run through the petals and lightly sketch them using thin, delicate strokes. These subtle details will add depth and authenticity to your artwork.
Highlighting and Shadows:
Just like the outer petals, the inner petals should have areas of highlight and shadow to create a three-dimensional effect. Use your eraser to lighten certain areas and add highlights, and use shading techniques to create shadows where the petals overlap or where they curve away from the light source.
By dedicating attention to the details and textures of the inner petals, you'll elevate your rose drawing to a new level of intricacy and realism.
Sketching the Stem and Leaves
A rose wouldn't be complete without a graceful stem and lush leaves. Let's explore the process of sketching these essential elements:
Stem Guidelines:
Begin by lightly sketching a guideline for the stem. The stem should extend from the base of the rose and gradually taper as it reaches the bottom of your drawing. Pay attention to the natural curves and bends of a rose stem, adding slight variations to make it look more organic.
Adding Leaves:
Next, sketch the leaves along the stem. Rose leaves typically have a serrated edge and an oval or elongated shape. Place the leaves alternately along the stem, ensuring that they are proportionate to the size of the rose. Remember to vary the sizes and angles of the leaves to create a natural and balanced composition.
Leaf Veins and Textures:
To add realism to your rose drawing, depict the veins and textures on the leaves. Observe the natural patterns and lines on rose leaves and lightly sketch them using thin, delicate strokes. These details will contribute to the overall visual interest and authenticity of your artwork.
Shading and Highlighting:
Use shading techniques to create depth and three-dimensionality in the stem and leaves. Pay attention to the direction of light and shade accordingly. Use darker tones in areas where the leaves overlap or where they are in shadow, and lighter tones in areas that catch the light. Remember to leave areas of highlight on the leaves to create contrast and make them appear more realistic.
By sketching the stem and leaves with attention to detail and incorporating shading techniques, you'll bring balance and harmony to your rose drawing, completing its natural beauty.
Shading and Adding Depth
Shading is a crucial aspect of any drawing, as it creates depth, dimension, and realism. Let's delve into the techniques of shading and adding depth to your rose drawing:
Understanding Light and Shadow:
Before you start shading, it's important to understand how light interacts with objects. Observe your reference image or a real rose to identify the areas of light and shadow. Pay attention to the direction of light and the subtle changes in value.
Gradual Shading:
Begin shading by using a pencil with a soft lead, such as a 2B or 4B. Start with light, gentle strokes and gradually build up the layers of graphite to create darker areas. Use a blending stump or tortillon to smooth out the transitions between light and dark areas, creating a gradual gradient.
Texture and Shape Shading:
Consider the texture of the rose petals and how it affects the way light interacts with them. Use cross-hatching or stippling techniques to create texture and depth in areas with rougher or velvety textures. For smoother areas, use smooth, even shading to create a soft and delicate appearance.
Highlighting:
Highlighting is just as important as shading. Use an eraser or a kneaded eraser to carefully lift off graphite in areas that catch the light. This will create highlights and make your rose drawing appear more three-dimensional.
Creating Contrast:
Contrast plays a crucial role in creating depth and visual interest. Ensure that your drawing has a good balance of light and dark areas. By exaggerating the contrast, you can make certain areas of your rose drawing stand out, adding drama and impact.
By mastering shading techniques and paying attention to light, shadow, and texture, your rose drawing will come to life and captivate viewers with its depth and realism.
Creating Realistic Textures
Textures add a touch of realism to your drawings, making them visually engaging and appealing. Let's explore various textures found in a rose and techniques to depict them accurately:
Petal Textures:
Rose petals have a unique texture characterized by delicate creases, wrinkles, and ridges. Use hatching, cross-hatching, or stippling techniques to create these textures. Observe your reference image or a real rose to understand how the texture varies from petal to petal and apply the appropriate technique accordingly.
Velvet-like Petals:
Some rose varieties have petals with a velvety texture. To depict this texture, use soft, curved lines or short, gentle strokes. Gradually build up the layers of graphite to create a soft and smooth appearance. Blend the strokes with a blending stump or tortillon to achieve a velvety effect.
Leaf Textures:
Rose leaves have a slightly rough texture with visible veins. Use hatching, cross-hatching, or stippling techniques to create the appearance of these veins. Pay attention to the direction and patterns of the veins, adjusting your strokes accordingly.
Stem Texture:
Rose stems have a slightly rough and woody texture. Use short, curved lines or gentle strokes to create this texture. Vary the pressure and direction of your strokes to mimic the natural appearance of the stem.
Buds and Thorns:
Don't forget to add texture to the buds and thorns of your rose drawing. Buds often have a slightly wrinkled texture, while thorns have a sharp and jagged appearance. Use short, curved lines or small dotting techniques to create these textures, capturing their unique characteristics.
By incorporating the appropriate textures into your rose drawing, you'll elevate its realism and create a visually captivating artwork.
Adding Color and Vibrancy
Color brings your drawing to life and allows you to showcase the vibrant beauty of a rose. Let's discuss different color schemes and techniques for adding color to your rose drawing:
Color Selection:
Consider the color scheme you want for your rose drawing. Roses come in various colors, such as red, pink, yellow, white, and more. Choose colors that evoke the desired mood and emotion. You can also experiment with unique color combinations to create a visually striking artwork.
Colored Pencils:
Colored pencils are an excellent medium for adding color to your rose drawing. Layer the colors gradually, starting with lighter shades and building up to darker shades. Consider the areas of light and shadow on your drawing and adjust the intensity of your colors accordingly.
Blending Colors:
To achieve smooth transitions between colors, use blending techniques. You can blend colors by layering them with a gentle, circular motion or by using a blending stump or tortillon. This blending technique will give your rose drawing a soft and realistic appearance.
Highlights and Shadows:
Pay attention to the areas of highlight and shadow on your rose drawing. Use lighter shades or leave areas white to represent highlights where the light hits the petals. For shadows, use darker shades or layer colors more heavily in areas that are in shadow or where the petals overlap.
Adding Details:
After applying the base colors, consider adding details using colored pencils or other mediums. You can enhance the texture and depth of your rose drawing by adding subtle lines, dots, or strokes with complementary colors. These details will bring your drawing to life and make it visually captivating.
By carefully selecting colors, employing blending techniques, and adding details, you'll infuse vibrancy and life into your rose drawing, creating a visually stunning artwork.
Showcasing Different Rose Varieties
Roses come in countless varieties, each with its own distinctive characteristics. As an artist, it's exciting to explore different rose types and capture their unique features in your drawings. Let's delve into drawing techniques specific to different rose varieties:
Hybrid Teas:
Hybrid tea roses are known for their large, high-centered blooms. When drawing hybrid teas, pay attention to the shape and size of their petals. Use long, elegant curves to depict their elongated petals and emphasize the high center of the bloom. Experiment with shading techniques to create depth and realism.
Climbers:
Climbing roses have long, flexible stems that allow them to climb walls, fences, or trellises. When drawing climbing roses, focus on capturing the graceful curves and twists of their stems. Pay attention to the arrangement of leaves and tendrils along the stem, and vary the thickness and direction of your lines to depict these intricate features.
Wild Roses:
Wild roses, also known as species roses, have a more natural and informal appearance compared to hybrid roses. When drawing wild roses, embrace their delicate and dainty nature. Use shorter, curved lines to represent their smaller petals and add subtle details to capture their rustic charm.
Old Garden Roses:
Old garden roses are cherished for their classic beauty and fragrant blooms. When drawing old garden roses, pay attention to the shape and arrangement of their petals. Use soft, gentle curves to depict their romantic and full-bodied blooms. Experiment with shading techniques to add depth and accentuate the layers of petals.
Modern Roses:
Modern roses, such as floribundas and grandifloras, are popular for their abundant blooms and vibrant colors. When drawing modern roses, emphasize their clusters of flowers. Use shorter, curved lines to depict their smaller individual petals and experiment with color to capture their striking beauty.
By exploring different rose varieties and adjusting your drawing techniques accordingly, you'll expand your artistic repertoire and be able to create a diverse range of rose drawings with confidence.
Adding the Finishing Touches
Every artwork benefits from the final finishing touches that bring it to completion. Let's discuss the process of refining your rose drawing and adding those final details:
Refining and Smoothing:
Take a step back and assess your rose drawing as a whole. Look for any areas that need refinement or improvement. Use an eraser or a kneaded eraser to gently remove any unwanted lines or smudges. Smooth out any harsh transitions between colors or shading using a blending stump or tortillon.
Adding Delicate Details:
Now is the time to add those delicate details that will elevate your rose drawing. Use a sharpened pencil or a fine-tipped pen to add subtle lines, dots, or strokes. These details can enhance the texture of the petals, depict the veins in the leaves, or add the thorns on the stem. Be mindful of not overdoing it; these details should enhance the overall composition without overwhelming it.
Signing and Presenting:
Once you are satisfied with your rose drawing, consider adding your signature. Sign your artwork in a discreet location, such as the bottom corner, using a pencil or pen. This personal touch not only marks your artistic creation but also adds a sense of completion. Finally, consider matting and framing your rose drawing to protect it and showcase it in all its glory.
As you add the finishing touches to your rose drawing, take a moment to appreciate the time and effort you've dedicated to this artistic journey. Your completed artwork is a testament to your creativity and passion.
In conclusion, learning how to draw a rose is a fulfilling artistic endeavor that allows you to capture the timeless beauty of this enchanting flower. By understanding the basic shapes, adding intricate details, and mastering shading and coloring techniques, you can create a stunning rose drawing that showcases your artistic skills. Remember, practice is key, so embrace the beauty of roses and let your creativity blossom as you embark on this artistic journey!
Comments
Post a Comment