
Are you ready to impress your family and friends with a perfectly cooked turkey? Look no further! In this comprehensive guide, we will walk you through the step-by-step process of cooking a turkey to perfection. Whether you're a beginner in the kitchen or an experienced home cook, this article will provide you with all the information you need to prepare a mouthwatering turkey that will leave everyone asking for seconds.
From selecting the right bird to mastering the cooking techniques, we will cover every aspect of turkey preparation. So, grab your apron, roll up your sleeves, and let's dive into the world of turkey cooking!
Choosing the Perfect Turkey
Before you start cooking, it's essential to select the right turkey for your feast. Choosing a turkey involves considering factors such as size, freshness, and quality. Let's explore each of these aspects in detail:
Size Matters
The first consideration when choosing a turkey is its size. A general rule of thumb is to estimate about 1 pound of turkey per person, which ensures there's enough for everyone and some leftovers. However, if you want ample leftovers or if you have a smaller appetite, you may want to increase or decrease the size accordingly. Additionally, consider the size of your oven and roasting pan, ensuring the turkey will fit comfortably without overcrowding.
Freshness and Quality
When it comes to freshness, you have two main options: fresh or frozen. Fresh turkeys are typically more expensive but offer the advantage of not requiring thawing. On the other hand, frozen turkeys are more widely available and can be purchased in advance. When buying a frozen turkey, ensure it's still well within its expiration date. Look for turkeys labeled "young" or "plump," as they tend to be more tender and flavorful.
Thawing Your Turkey
If you opt for a frozen turkey, proper thawing is crucial to ensure even cooking. There are three safe methods to thaw a turkey: refrigerator thawing, cold water thawing, and microwave thawing.
Refrigerator thawing is the most convenient and recommended method. Place the turkey, still in its original packaging, on a tray or in a shallow pan in the refrigerator. Allow approximately 24 hours of thawing time for every 4 to 5 pounds of turkey. Make sure the refrigerator temperature is set to 40°F or below to prevent bacterial growth.
Cold water thawing is faster but requires more attention. Fill a clean sink or a large container with cold water. Submerge the turkey in its original packaging, making sure it's fully covered. Change the water every 30 minutes to maintain a cold temperature. Allow about 30 minutes of thawing time per pound of turkey.
Microwave thawing is the quickest method but may result in uneven thawing and partial cooking. Check the turkey's packaging for specific instructions on using the microwave for thawing. If using this method, make sure to cook the turkey immediately after thawing to prevent bacterial growth.
Prepping the Turkey
Properly preparing the turkey is crucial for a delicious outcome. Let's explore the necessary steps for cleaning, seasoning, and trussing the bird:
Cleaning the Turkey
Before seasoning the turkey, it's important to clean it thoroughly. Remove the giblets and neck from the cavities, which are usually found in a bag inside the turkey. Rinse the turkey inside and out with cold water, patting it dry with paper towels. Make sure to remove any excess moisture to promote crispy skin during cooking.
Seasoning the Turkey
Seasoning is where you can infuse the turkey with flavors and aromas. There are countless seasoning options, but a classic mixture of salt, pepper, and herbs is always a winner. Create a seasoning blend by combining salt, black pepper, garlic powder, onion powder, and herbs like thyme, rosemary, and sage. Rub the seasoning mixture generously all over the turkey, both on the outside and inside the cavities. For enhanced flavor, you can also create a compound butter by mixing softened butter with herbs and spices, then spreading it under the turkey's skin.
Trussing the Turkey
Trussing is a technique used to secure the turkey's legs and wings, ensuring even cooking and a neater presentation. To truss the turkey, start by tucking the turkey's wings underneath its body. Then, tie the legs together with kitchen twine, keeping them close to the turkey's body. This step helps the turkey maintain its shape and promotes even cooking.
Flavoring Options
While a properly seasoned turkey is delicious on its own, you can take it to the next level by adding additional flavors. Consider stuffing the turkey with aromatics like onions, garlic, citrus fruits, and fresh herbs. These ingredients will release their flavors during cooking, infusing the turkey with a delightful fragrance. You can also baste the turkey with a mixture of melted butter and herbs throughout the cooking process to enhance both flavor and moisture.
Cooking Methods
There are various cooking methods to choose from when it comes to preparing a turkey. Let's explore some popular techniques and their pros and cons:
Roasting
Roasting is the most traditional and widely used method for cooking a turkey. It involves cooking the turkey in an oven at a consistent temperature. The even heat distribution allows for thorough cooking and creates a beautifully browned exterior. Roasting is generally a hands-off method, allowing you to focus on side dishes or other preparations while the turkey cooks.
Grilling
Grilling a turkey can add a unique smoky flavor to the bird while also freeing up oven space. Grilling involves cooking the turkey over indirect heat on a gas or charcoal grill. This method requires attentive monitoring of the grill's temperature to maintain an even cooking environment. Grilled turkeys often develop tantalizing grill marks and a slightly smoky taste that can impress your guests.
Smoking
Smoking a turkey infuses it with rich, smoky flavors, resulting in a unique and delicious outcome. The smoking process involves slow-cooking the turkey over low heat, usually with the addition of flavored wood chips. Smoking requires a specialized smoker or grill equipped for this technique. It is a longer cooking method, but the results are well worth the wait.
Deep-Frying
Deep-frying a turkey yields a crispy exterior and juicy, flavorful meat. This method involves submerging the turkey in hot oil, resulting in a quick cooking time and a beautiful golden-brown skin. Deep-frying requires caution and careful preparation to ensure safety and avoid oil splatters. It's essential to use a deep fryer specifically designed for turkey frying and to follow all safety instructions.
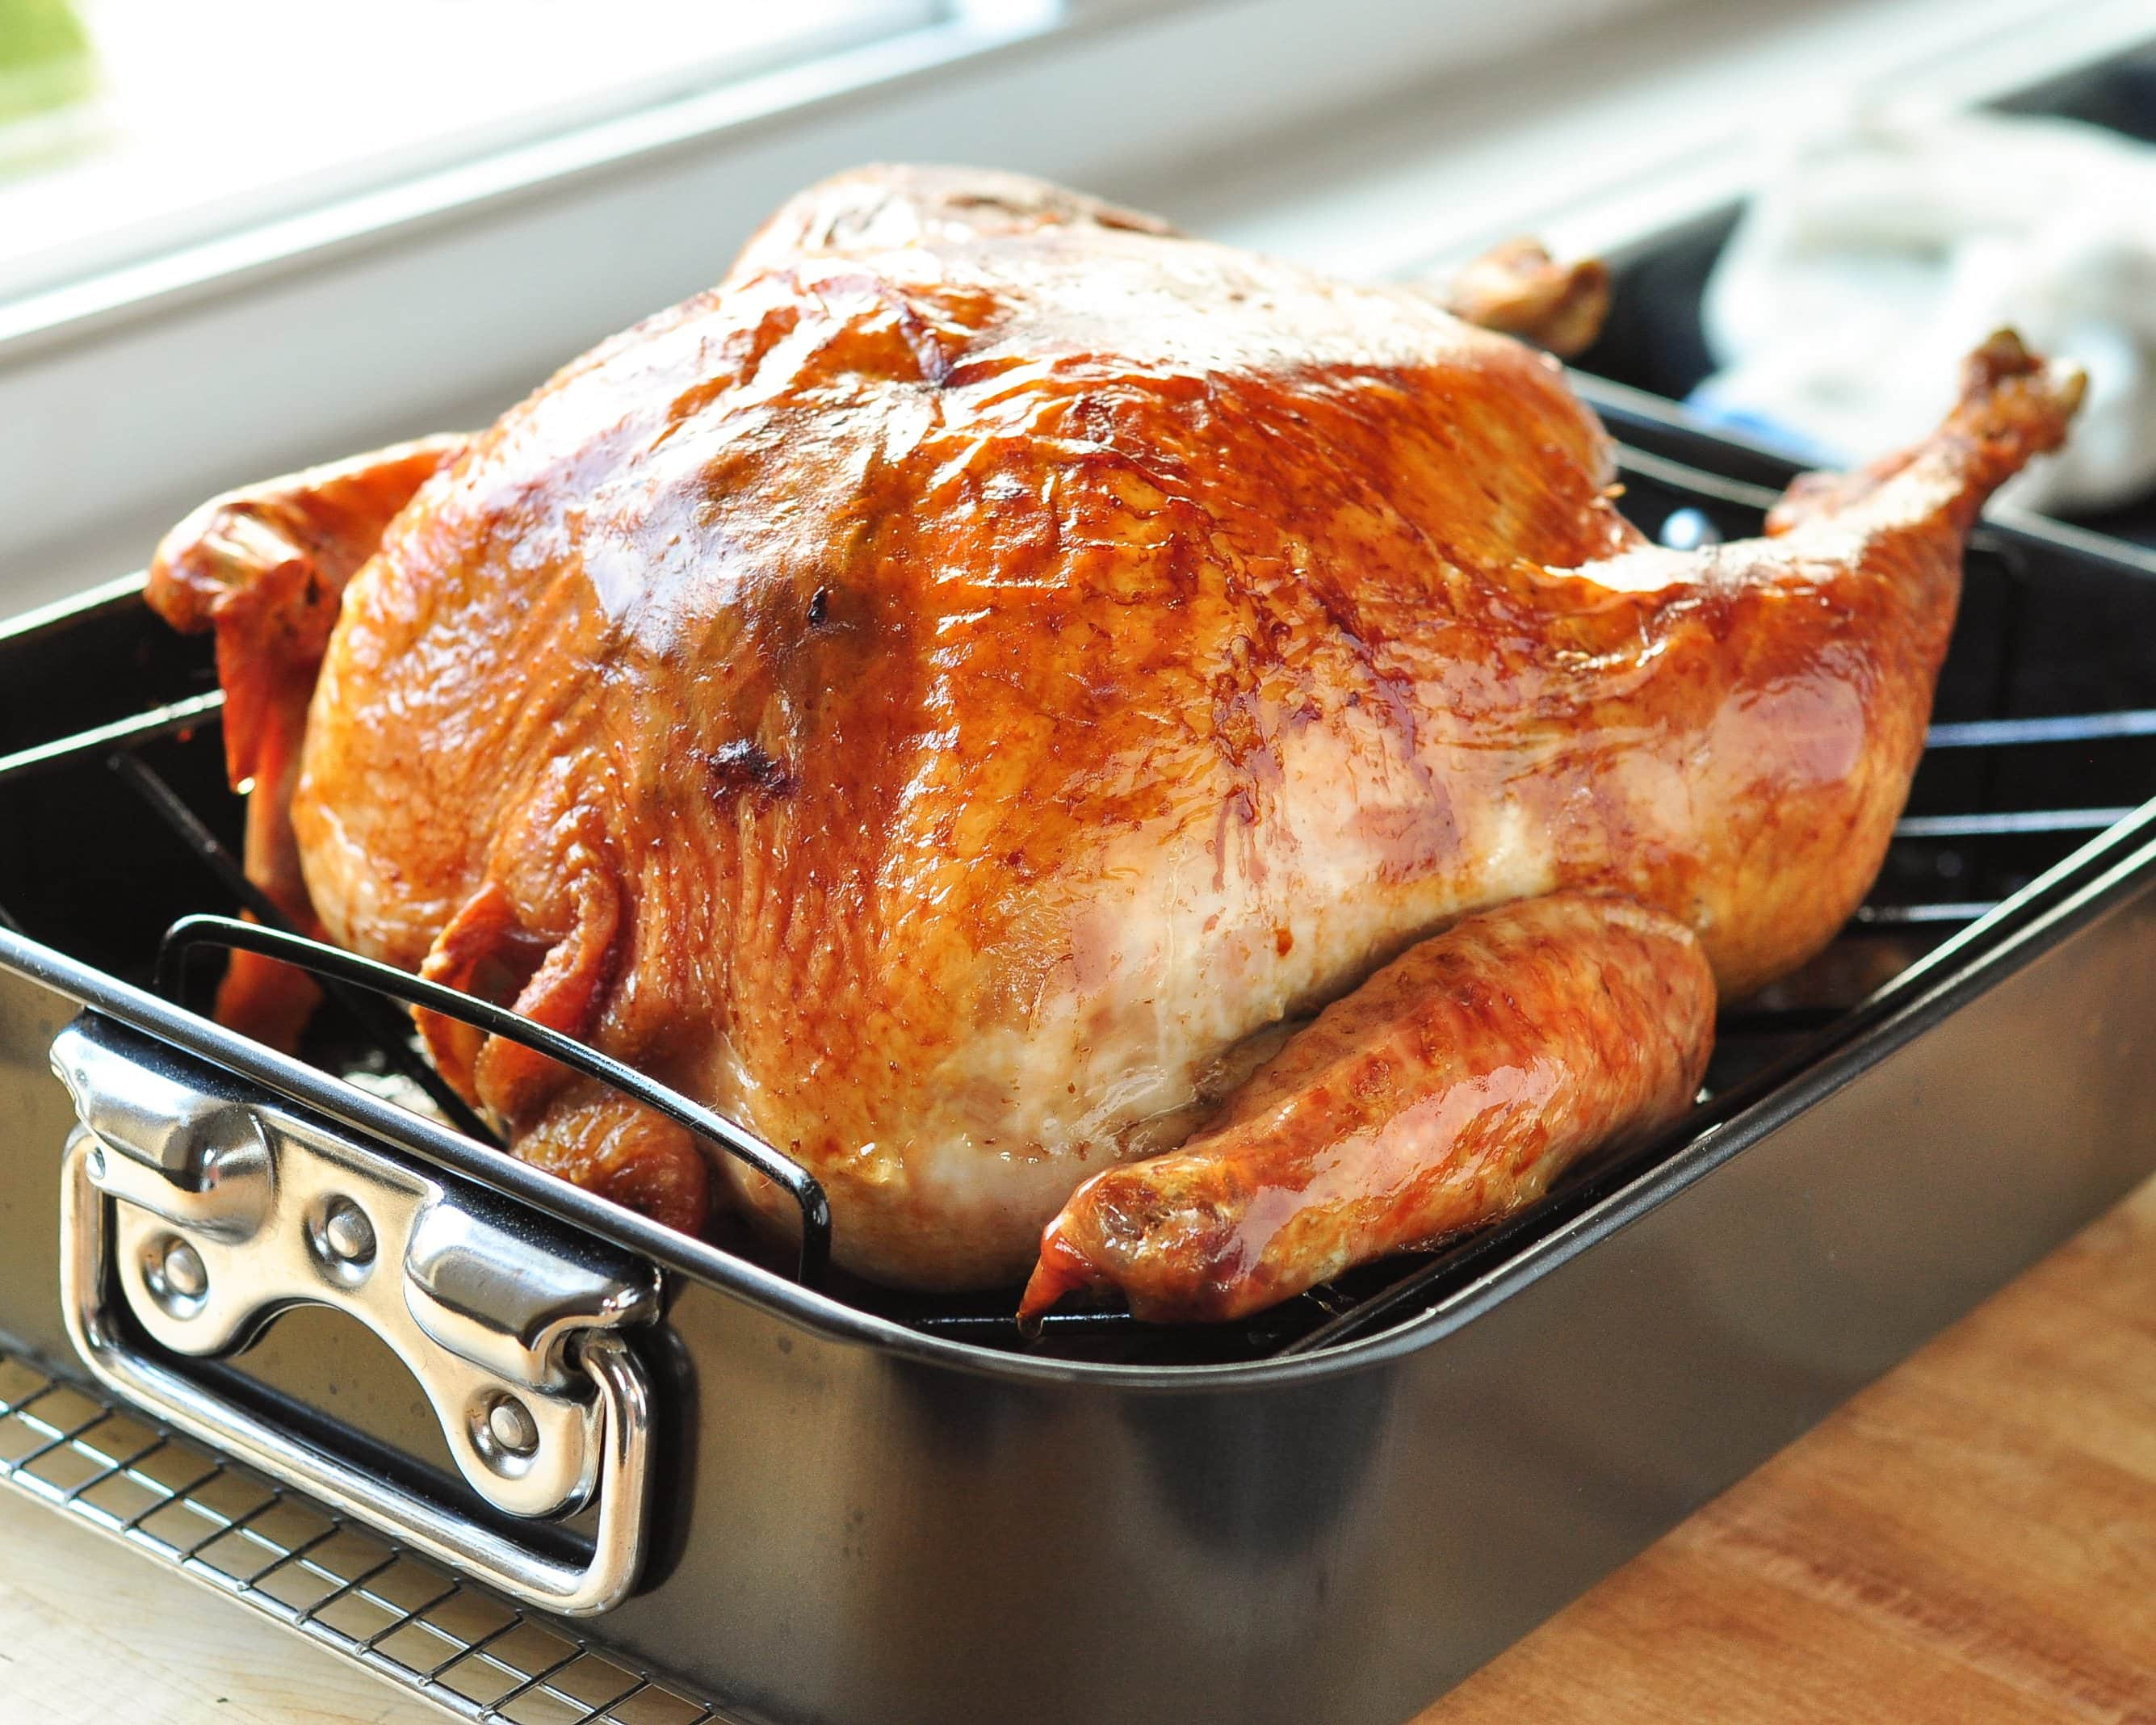
The Perfect Roast Turkey
If you prefer the classic roast turkey, this section will guide you through the step-by-step process of roasting a turkey to perfection:
Preheating the Oven
Before you embark on roasting your turkey, preheat your oven to the appropriate temperature. Most recipes call for a preheating temperature of around 325°F (163°C). Preheating ensures that the oven is at the right temperature when you put the turkey in, promoting even cooking.
Preparing the Roasting Pan
A sturdy roasting pan is essential for roasting a turkey. Choose a pan with high sides to catch any drippings and prevent them from spilling. Place a roasting rack inside the pan to elevate the turkey and allow heat to circulate evenly. This prevents the turkey from sitting in its juices and promotes even browning.
Positioning the Turkey
Once your roasting pan is ready, transfer the seasoned turkey onto the roasting rack, breast-side up. Tuck the wings underneath the turkey to prevent them from burning. Positioning the turkey correctly ensures even cooking and a beautiful presentation.
Roasting Time and Temperature
The cooking time and temperature will depend on the size of your turkey. As a general guideline, roast the turkey at 325°F (163°C) until it reaches an internal temperature of 165°F (74°C) in the thickest part of the thigh. A meat thermometer is a valuable tool to accurately monitor the turkey's internal temperature and prevent overcooking.
Basting the Turkey
Basting involves brushing the turkey with a mixture of melted butter and herbs to add moisture and enhance flavor. Basting can be done every 30 minutes or so throughout the cooking process. However, keep in mind that opening the oven frequently can increase the cooking time, so basting should be done quickly and efficiently.
Resting the Turkey
Once the turkey reaches the desired internal temperature, remove it from the oven and let it rest for about 20-30 minutes before carving. Resting allows the juices to redistribute, resulting in a moist and tender turkey. Tent the turkey loosely with aluminum foil to retain heat during the resting period.
Carving the Turkey
Carving a turkey can seem intimidating, but with a few simple steps, you'll be able to carve it like a pro. Start by removing the trussing string and the wings. Then, make a horizontal cut just above the leg, separating the thigh from the breast. Repeat on the other side. Finally, slice the breast meat against the grain into thin, even slices. Serve the carved turkey on a platter, and garnish with fresh herbs for an elegant presentation.
Grilled Turkey Delights
If you want to add a smoky flavor to your turkey, grilling is the way to go. Here's how to prepare and grill a turkey using both gas and charcoal grills:
Preparing the Grill
Whether you're using a gas or charcoal grill, it's important to prepare it properly before grilling your turkey. For a gas grill, preheat the grill to medium heat. Clean the grates thoroughly and brush them with oil to prevent sticking. For a charcoal grill, light the charcoal and let it burn until covered with white ash. Place the charcoal on one side of the grill to create an indirect cooking zone.
Grilling Techniques
There are two main techniques for grilling a turkey: direct heat and indirect heat. Direct heat involves placing the turkey directly over the flames or hot coals. Indirect heat involves placing the turkey away from the heat source, allowing it to cook slowly with indirect heat circulating around it. Both methods have their benefits, so choose the one that suits your preferences.
Grilling Time and Temperature
Grilling time and temperature will vary depending on the size of your turkey, the grill's heat, and the grilling technique used. As a general guideline, grill the turkey over medium heat, aiming for an internal temperature of 165°F (74°C) in the thickest part of the thigh. Use a meat thermometer to ensure accurate cooking and prevent under or overcooking.
Basting and Flavoring on the Grill
While grilling, you can enhance the turkey's flavor by basting it with a mixture of melted butter and herbs. Basting helps to keep the turkey moist and infuse it with additional flavors. Brush the basting mixture onto the turkey every 30 minutes or so during the grilling process, taking care not to let the flames flare up and burn the turkey.
Monitoring and Rotating the Turkey
Throughout the grilling process, it's important to monitor the turkey closely to ensure even cooking. Rotate the turkey occasionally to promote uniform browning. If using the indirect heat method, you may need to add more charcoal or adjust the gas burners to maintain a consistent temperature.
Resting and Carving
Once the turkey reaches the desired internal temperature, remove it from the grill and let it rest for about 20-30 minutes before carving. Resting allows the juices to redistribute, resulting in a flavorful and juicy turkey. Carve the turkey following the same steps as for a roasted turkey, and serve it with pride.
Smoked Turkey: A Flavorful Twist
Smoking a turkey infuses it with rich, smoky flavors, creating a unique and delicious outcome. Here's how to smoke a turkey to perfection:
Selecting the Right Wood Chips
The type of wood chips you choose for smoking will greatly impact the turkey's flavor. Different wood varieties, such as apple, hickory, or mesquite, offer distinct smoky aromas. Consider the intensity of the smoke you desire and choose the wood chips accordingly. Soak the wood chips in water for at least 30 minutes before using them in the smoker.
Preparing the Smoker
If you have a dedicated smoker, follow the manufacturer's instructions for usage and temperature control. Preheat the smoker to a temperature of around 225°F (107°C). Place a water-filled pan in the smoker to maintain moisture and prevent the turkey from drying out.
Smoking Techniques
There are two main smoking techniques: hot smoking and cold smoking. Hot smoking involves cooking the turkey at a temperature between 200°F (93°C) and 275°F (135°C). Cold smoking, on the other hand, is done at temperatures below 100°F (38°C) and typically requires additional equipment. For this guide, we'll focus on hot smoking, which is more common for cooking a whole turkey.
Smoking Time and Temperature
Smoking a turkey is a slow and low process, with cooking times varying depending on the turkey's size and the smoker's temperature. As a general guideline, estimate about 30-40 minutes of smoking time per pound of turkey. Aim for an internal temperature of 165°F (74°C) in the thickest part of the thigh. Use a meat thermometer to ensure accurate cooking and prevent under or overcooking.
Basting and Flavoring on the Smoker
While smoking, you can enhance the turkey's flavor by basting it with a mixture of melted butter and herbs. Basting helps to keep the turkey moist and infuse it with additional flavors. Baste the turkey every 30 minutes or so during the smoking process, taking care not to let too much heat escape from the smoker.
Monitoring and Maintaining Temperature
Throughout the smoking process, it's important to monitor the smoker's temperature and make adjustments as needed. Maintain a consistent temperature within the recommended range to ensure thorough and even cooking. Add soaked wood chips regularly to continue producing smoke and infusing the turkey with flavor.
Resting and Carving
Once the turkey reaches the desired internal temperature, remove it from the smoker and let it rest for about 20-30 minutes before carving. Resting allows the juices to redistribute, resulting in a flavorful and juicy turkey. Follow the same steps as for a roasted turkey when carving, and enjoy the delicious smoky flavors.
Deep-Fried Turkey: Crispy and Juicy
Deep-frying a turkey yields a crispy exterior and juicy, flavorful meat. Here's how to safely and deliciously deep-fry a turkey:
Preparing the Deep Fryer
Deep-frying a turkey requires a specialized deep fryer designed for this purpose. It's crucial to read and follow the manufacturer's instructions carefully. Set up the fryer in an open outdoor area, away from any structures or flammable materials. Ensure the fryer is on a stable surface and that the propane tank is securely attached.
Measuring the Oil
Using too much oil can lead to dangerous spills and fires, while too little oil may cause the turkey to cook unevenly. Before heating the oil, place the turkey inside the empty fryer and fill it with water until the turkey is fully submerged. Remove the turkey and take note of the water level. This will help you determine the appropriate amount of oil needed.
Heating the Oil
Begin heating the oil in the fryer, following the manufacturer's instructions. Monitor the temperature of the oil using a deep-fry thermometer. The ideal temperature for deep-frying a turkey is around 350°F (175°C). It's important to maintain a constant temperature throughout the frying process to ensure even cooking and prevent oil splatters.
Lowering the Turkey into the Fryer
Once the oil has reached the desired temperature, carefully lower the turkey into the fryer using a turkey basket or a sturdy utensil designed for this purpose. Slowly and gently lower the turkey into the hot oil, ensuring it is fully immersed. This step requires caution to avoid any oil splatters or accidents.
Frying Time and Temperature
The cooking time for a deep-fried turkey is relatively quick compared to other methods. As a general guideline, deep-fry the turkey for about 3-4 minutes per pound. Aim for an internal temperature of 165°F (74°C) in the thickest part of the thigh. Use a meat thermometer to ensure accurate cooking and prevent under or overcooking.
Monitoring and Safety Measures
While the turkey is frying, monitor the oil temperature closely and make adjustments as needed to maintain a consistent heat level. Never leave the fryer unattended, and keep a fire extinguisher nearby in case of emergencies. Be mindful of safety precautions to prevent oil splatters, including wearing protective gloves and keeping a safe distance from the fryer.
Resting and Carving
Once the turkey is cooked, carefully remove it from the fryer, allowing any excess oil to drip off. Place the turkey on a tray lined with paper towels to absorb any remaining oil. Let the turkey rest for about 20-30 minutes before carving. Resting allows the juices to redistribute, resulting in a flavorful and juicy turkey. Follow the same steps as for a roasted turkey when carving, and enjoy the crispy and succulent results.
Side Dishes and Accompaniments
No Thanksgiving or holiday meal is complete without delightful side dishes and accompaniments. Here are some ideas to complement your turkey feast:
Savory Stuffing
Stuffing is a classic side dish that pairs perfectly with turkey. Whether you prefer a traditional bread stuffing or a more adventurous version with sausage, applesand cranberries, stuffing adds a delicious element to your turkey feast. The combination of herbs, bread, and various ingredients creates a flavorful and comforting accompaniment. Be sure to cook the stuffing separately from the turkey to ensure proper cooking and food safety.
Wholesome Mashed Potatoes
Mashed potatoes are a staple side dish that complements turkey beautifully. Creamy, fluffy, and buttery, they provide the perfect canvas for gravy. To make mashed potatoes, peel and boil potatoes until tender. Mash them with butter, milk, salt, and pepper until smooth and creamy. For added flavor, consider incorporating roasted garlic, cheddar cheese, or fresh herbs such as chives or parsley.
Glorious Gravy
No turkey dinner is complete without a rich and flavorful gravy. Gravy adds moisture and enhances the taste of both the turkey and the side dishes. To make turkey gravy, use the drippings from the roasted turkey. In a saucepan, combine the drippings with flour or cornstarch and broth. Whisk the mixture over medium heat until it thickens to your desired consistency. Season with salt, pepper, and herbs to taste.
Tangy Cranberry Sauce
Cranberry sauce provides a delightful contrast to the savory flavors of the turkey. Whether you prefer a classic cranberry sauce or a more unique variation with orange zest or spices, this tangy condiment adds a burst of flavor to your meal. You can make cranberry sauce from scratch by simmering fresh or frozen cranberries with sugar and water until they burst and thicken.
Colorful Roasted Vegetables
Roasted vegetables are a vibrant and nutritious addition to your turkey feast. Consider roasting a medley of vegetables such as carrots, Brussels sprouts, sweet potatoes, and parsnips. Toss the vegetables with olive oil, salt, pepper, and herbs, then roast them in the oven until tender and caramelized. The natural sweetness and roasted flavors of the vegetables perfectly complement the turkey.
Refreshing Salad
A fresh and crisp salad can provide a refreshing contrast to the rich and hearty turkey. Consider a salad with mixed greens, cherry tomatoes, cucumber slices, and a tangy vinaigrette. You can also incorporate seasonal fruits such as pomegranate arils or sliced apples for added sweetness and texture. The salad adds a light and refreshing element to balance the meal.
Buttery Dinner Rolls
Soft and buttery dinner rolls are a must-have for any turkey dinner. They are perfect for sopping up gravy and making mini turkey sandwiches with leftovers. You can make homemade dinner rolls from scratch, or if you prefer a time-saving option, store-bought rolls can be just as delicious. Warm them up before serving for a comforting addition to your meal.
Decadent Pumpkin Pie
No Thanksgiving dinner is complete without a slice of pumpkin pie. The warm spices and creamy pumpkin filling make it the quintessential fall dessert. You can make a homemade pumpkin pie by baking a sweet and buttery crust filled with a mixture of pumpkin puree, sugar, eggs, and spices. Serve it with a dollop of whipped cream or a scoop of vanilla ice cream for the perfect finishing touch.
Creative Leftovers
Leftovers are an inevitable part of a turkey feast, but they don't have to be boring. Get creative with your leftovers by making turkey sandwiches, turkey pot pie, or even a turkey soup. Use the remaining meat, stuffing, and cranberry sauce to create delicious and satisfying meals in the days following your feast. Leftovers can be just as enjoyable as the main event.
Carving and Serving
Carving a turkey can seem daunting, but with the right technique, you'll be able to present a beautifully carved turkey to your guests. Follow these steps to carve your turkey like a pro:
Resting the Turkey
Before carving, it's crucial to let the turkey rest. Remove the turkey from the roasting pan and place it on a cutting board or a serving platter. Tent the turkey loosely with aluminum foil to retain heat. Resting allows the juices to redistribute, resulting in a more tender and flavorful turkey.
Removing the Legs and Thighs
Start by removing the legs and thighs from the turkey. Hold the turkey steady with a carving fork and use a sharp carving knife to cut through the skin between the breast and the leg. Pull the leg away from the body until the joint pops out of place. Cut through the joint to separate the leg from the turkey. Repeat on the other side.
Slicing the Breast Meat
Once the legs and thighs are removed, it's time to slice the breast meat. Slice parallel to the breastbone, starting at the top and working your way down. Use smooth, even strokes to create thin slices. Aim for slices of consistent thickness to ensure everyone gets a tender and juicy piece of breast meat.
Serving the Carved Turkey
Arrange the sliced turkey on a serving platter or individual plates. Garnish with fresh herbs such as parsley or rosemary for an added touch of elegance. Serve the carved turkey alongside your delicious side dishes and accompaniments. Don't forget to offer extra gravy and cranberry sauce for those who want to enhance the flavors further.
Troubleshooting and Frequently Asked Questions
Even with careful preparation, cooking a turkey can sometimes present challenges. Here are some common troubleshooting tips and frequently asked questions:
My Turkey is Dry. How Can I Fix It?
If your turkey turns out dry, there are a few ways to remedy the situation. One option is to drizzle some warm turkey or chicken broth over the carved meat before serving. This will add moisture and revive the flavors. Another option is to make a quick gravy or sauce to accompany the turkey, which can help mask any dryness. Finally, consider serving the turkey with extra condiments like cranberry sauce or flavored butters to enhance the overall taste and moisture.
My Turkey is Undercooked. What Should I Do?
If you discover that your turkey is undercooked, it's important to address the issue promptly. Return the turkey to the oven and continue cooking it until it reaches the recommended internal temperature. Keep a close eye on the turkey to avoid overcooking it. If the skin starts to brown too quickly, cover it loosely with aluminum foil to prevent burning. Once fully cooked, let the turkey rest before carving and serving.
How Do I Store Leftover Turkey?
Properly storing leftover turkey is essential to maintain its quality and safety. Allow the turkey to cool completely before refrigerating or freezing. Remove the meat from the bones and store it in airtight containers or resealable bags. Refrigerate the turkey for up to 4 days or freeze it for up to 3 months. When reheating, ensure the turkey reaches an internal temperature of 165°F (74°C) to prevent any foodborne illnesses.
Can I Stuff and Cook the Turkey in Advance?
It is generally not recommended to stuff a turkey in advance due to food safety concerns. Stuffing can provide a breeding ground for bacteria, especially if it's prepared ahead of time and stored inside the turkey. Instead, prepare the stuffing separately and cook it in a casserole dish alongside the turkey. This ensures that both the turkey and stuffing reach their proper cooking temperatures and reduces the risk of foodborne illnesses.
Can I Use the Turkey Drippings for Gravy?
Yes, the turkey drippings can be used to make a delicious gravy. After removing the turkey from the roasting pan, pour the drippings into a fat separator or a bowl. Skim off the fat from the top and transfer the remaining liquid to a saucepan. Add flour or cornstarch to thicken the liquid and whisk it over medium heat until desired consistency is reached. Season with salt, pepper, and herbs to taste. The turkey drippings provide the base for a flavorful and rich gravy.
What Can I Do with Leftover Turkey?
Leftover turkey can be transformed into a variety of delicious meals. Some popular options include turkey sandwiches, turkey pot pie, turkey soup, turkey salad, or turkey stir-fry. Get creative and experiment with different recipes to make the most of your leftovers. The versatility of leftover turkey allows you to enjoy its flavors in new and exciting ways.
In conclusion, cooking a turkey to perfection requires careful preparation, cooking techniques, and attention to detail. With the help of this comprehensive guide, you'll be well-equipped to create a delicious turkey that will be the star of your next holiday gathering. From choosing the right bird to selecting cooking methods and preparing delectable side dishes, you have all the tools to impress your family and friends with your culinary skills. So, put on your chef's hat, gather your loved ones, and enjoy a memorable and flavorful turkey feast!
Comments
Post a Comment